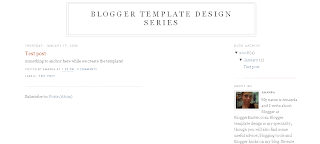
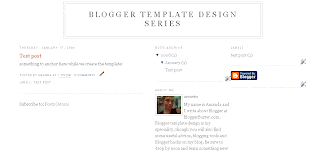
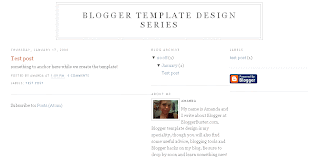
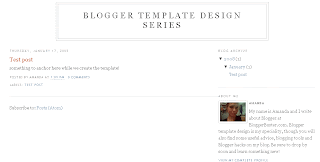
 When I begin to design a new Blogger template, the first thing I take into consideration is the overall layout. Creating the perfect layout is crucial to the design process, and should be the first step in designing a custom Blogger template.
The most popular layout styles for Blogger blogs are:
- Three columns, with sidebars to the left and right
- Three columns with two sidebars to the right
- A wide two column template, with a wider posts area and a wide sidebar to the right
So in this installment of the Blogger Template Design series, I will offer basic instructions for how each of these layouts can be constructed. Then in the next installment, I will focus on tweaking these layouts in order to make the canvas complete.
For the purpose of this series, I have created a demonstration blog which you can view here. This demonstration blog will be used to demonstrate customizations throughout the series, and will include links back to each chapter of the series for your reference.
Things you should consider when deciding on your blog layout
Visual appeal is not the only thing you should consider when deciding which layout you will adopt for your template. The three different styles I highlighted above can all serve different functional purposes; depending on you wish to display in your sidebars, one or other may be better suited to your needs:
- Three column templates with sidebars to the left and right are best suited to blogs which don't use many Javascripts or images in the sidebars.
This is because Javascripts and images call upon different servers and slow down page loading time. If you have many scripts or images loading in the left sidebar, this can delay the loading of your posts, which is off-putting for new visitors to your blog (especially those who access the Internet through dial-up!) - Three column templates with both sidebars aligned to the right are a good choice for blogs which feature a lot of different content in the sidebars.
This style helps neaten the content of sidebars, prevents lengthy loading delays of the blog entries (the primary content) and stops the sidebars from becoming too long in relation the main content on post pages. - Two column templates with a wide posts section and wide sidebar are most suitable for those who feature ads in the sidebar, or who need much content to be "above the fold" of the page.
Wider sidebars allow for wider ads, or rows of the popular 125x125 square ad boxes which can feature higher up the page. Also, it is easier to display wider images, or text blocks. A wider posts section will also allow more content to be featured above the fold, and can prevent home pages from becoming too lengthy.
With this in mind, let's take a look at the different methods available for creating a template canvas.
The best way to create a customized template...
Is to base this on an existing template!
Blogger templates contain a vast variety of tags and code, which is very difficult to reconstruct by hand. By basing your customized template on an existing template which already has tags and code in place, you will make the job much easier for yourself, and will save hours (if not days) of time troubleshooting a hand coded template.
The recent poll I offered concluded that the most familiar template to Blogger Buster readers is the Minima template, so for the purpose of this series, I will base all tutorials on modifications of this template. By the time this series is complete, the resulting "demonstration" template will not resemble Minima at all!
Before we begin!
I would strongly recommend that you use a test blog to create your customized template rather than interfere with your main blog. For more information about test blogs, take a look at this post, or read through my guide to essential tools for customizing Blogger templates.
If you choose not to use a test blog, you must back up your existing template before making any changes to it!
From this point forwards, I will assume that you are either using a test blog to create your new template, or that you have fully backed up your existing template.
Making a wider template
Over the years, the default Blogger templates have not changed much. Aside from the stretch designs (which are designed to accommodate the entire width of the browser window), most are rather narrow when compared to the size of most readers' browser screens.
So the first thing we will do to the Minima template is make it wider. The resulting width will then be large enough to include either two sidebars (instead of only one), or alternatively a wider posts column and a thicker sidebar.
The optimum width of a blog template
Most modern blog templates, whether hosted on Blogger, Wordpress or Typepad platforms, are between 800 and 950 pixels wide. This seems to be the optimum size range for blog templates, as this width can accommodate two sidebars or an expanded entries column.
I would recommend that you make your template no wider than 950 pixels. Even though this width may not fully span the width of your own browser window, you can be fairly certain that it will not run off the screen of smaller browsers.
In these tutorials, I will show you how to create a blog layout which is 950 pixels wide, though you can certainly make this a different value if you prefer.
Alter the outer-wrapper
The overall width of the Minima template is determined by the "outer-wrapper" div. This is styled within the <b:skin> section of the template as follows:
#outer-wrapper {
width: 660px;
margin:0 auto;
padding:10px;
text-align:$startSide;
font: $bodyfont;
}
To change the width of the template to 950 pixels, we simply need to change the line highlighted in red to this:
width: 950px;After this change, my demonstration blog now looks like this:
As you can see, there is now a wide gap between the posts column and the sidebar. We can fill this gap by using one of these methods:
Depending on your choice of blog layout, you will need to use one of the following methods for your custom template.
Creating a three column template (with a second sidebar)
Although I have previously written a post about this method, I have decided to revamp my method here to add some extra functionality to the finished template.
In this tutorial, we will create the following dimensions in the layout:
- Two sidebars, measuring 250px in width
- The main posts column will be 450 px wide
This ensures regularity of each element, and will make it easier to add margins and passing at a later stage.
Change the width of the sidebar
It is easier to change the width of the existing sidebar before we add another one. To do this, open your template (no need to expand the widget templates) and find this section of code in the <b:skin> section:
#sidebar-wrapper {
width: 220px;
float: $endSide;
word-wrap: break-word; /* fix for long text breaking sidebar float in IE */
overflow: hidden; /* fix for long non-text content breaking IE sidebar float */
}
Change the line highlighted in red to this:
width: 250px
Your sidebar will now be slightly wider.
Adding the style for the second sidebar
Before we can call the secind sidebar in the blog template, we will need to add the styling for this sidebar, and make it unique.
Find and copy this whole section from your template (this is the section we modified in the previous step):
#sidebar-wrapper {Once you have copied this to your clipboard, paste this section of code immedietly beneath the original set of code. Then change this line in your newly pasted code:
width: 250px;
float: $endSide;
word-wrap: break-word; /* fix for long text breaking sidebar float in IE */
overflow: hidden; /* fix for long non-text content breaking IE sidebar float */
}
#sidebar-wrapper {To say this instead:
#new-sidebar-wrapper {
This is the identity of the div which contains the sidebar wrappers. Each div element which has an ID must be unique and should only be called once within the page. By adding the "new" part to the title of the style for the div, we can ensure the new sidebar will display properly.
If you want your second sidebar to fleat to the right of the main posts column, you can leave the styling as it is.
However, if you prefer the sidebar to appear to the left of the main posts column, you will need to change the following line:
float: $endSide;To this instead:
float: $startSide;
This will ensure that your new sidebar will float to the left.
Calling the second sidebar in your blog template
To call the secind sidebar, we need to add a section of code to the actual template section. The location for this code changes depending on whether you wish the second sidebar to be aligned to the left or the right of the main posts column.
There are two possible locations for this second sidebar. Assuming you have not added any extra widgets to your Minima template, you will be able to find the following section of code in your Blogger template (do not expand the widget templates):
<div id='crosscol-wrapper' style='text-align:center'>I have included some comments here to show where to paste the following code, depending on your choice of alignment. When you have decided where you would like your second sidebar to appear, copy and paste the following section of code in the appropriate place:
<b:section class='crosscol' id='crosscol' showaddelement='no'/>
</div>
<!-- Insert code here for left sidebar -->
<div id='main-wrapper'>
<b:section class='main' id='main' showaddelement='no'>
<b:widget id='Blog1' locked='true' title='Blog Posts' type='Blog'/>
</b:section>
</div>
<!-- Insert code here for right aligned sidebar -->
<div id='sidebar-wrapper'>
<b:section class='sidebar' id='sidebar' preferred='yes'>
<b:widget id='BlogArchive1' locked='false' title='Blog Archive' type='BlogArchive'/>
<b:widget id='Profile1' locked='false' title='About Me' type='Profile'/>
</b:section>
</div>
<div id='new-sidebar-wrapper'>
<b:section class='sidebar' id='new-sidebar' preferred='yes'/>
</div>
You should save your new template at this point.
There is currently no content in this second sidebar, so if you preview your blog, nothing will be displayed in it's place. But if you go to Template>Page Elements in your Blogger dashboars, you will see a new "Add page element" section. Here you can add a new widget and take a look at your blog to see how it will be displayed.
In my demonstration blog, I added the new sidebar to appear to the right of the main column which now appears like this:
Change the width of the main posts column
The final customization to this three column layout is changing the width of the main posts column slighly to make better use of the space available.
This is another simple edit. Simply find this section in the <b:skin< section of your template code:
#main-wrapper {Change the line highlighted in red to the following:
width: 410px;
float: $startSide;
word-wrap: break-word; /* fix for long text breaking sidebar float in IE */
overflow: hidden; /* fix for long non-text content breaking IE sidebar float */
}
width: 450px;Then save your template.
The finished result should look something like this:
You will notice that there is no space between the sidebars or main posts column. To make space appear between each sections, we will need to use margins and/or padding in the style section, which I will demonstrate in the next chapter of the Blogger Template Design series.
Creating a wide, two column template
Creating a wider template with added space for the main posts column and sidebar is a much simpler process.
In this example, we will make the width of the posts column to 650px, and the width of the sidebar to 300px. You can change these values if you prefer, so long as the total of these two sections is 950px.
Assuming you have already changed the width of the "outer-wrapper" to 950px, you will now only need to make two small edits to the style section of your template.Change the width of the main posts column
The width of the main posts column is defined in the following section of code:
#main-wrapper {Simply change the line highlighted in red to this:
width: 410px;
float: $startSide;
word-wrap: break-word; /* fix for long text breaking sidebar float in IE */
overflow: hidden; /* fix for long non-text content breaking IE sidebar float */
}
width: 650px;
Change the width of the sidebar
The width of the sidebar id defined in the following section of code:
#sidebar-wrapper {Again, you only need to edit the line in red to say the following instead:
width: 220px;
float: $endSide;
word-wrap: break-word; /* fix for long text breaking sidebar float in IE */
overflow: hidden; /* fix for long non-text content breaking IE sidebar float */
}
width: 300px;
Finally, save your template and take a look at your newly widened blog. If you have used the same values as I did, your new template should appear like this:
As with the three column layout, you will notice there is no space between the sidebars and the main posts column. We will work on optimizing this canvas in the next installment of the Blogger Template Design series.
Final words
For your convenience, I have made each of the template layouts described above available for download as an XML template. To download any of these files, right click on the link and choose "Save As..."
- Three column canvas, sidebars to the left and right
- Three column canvas, both sidebars to the right
- Wide, two column canvas
Progress of the demonstration blog
For the demonstration blog which will accompany this series, I have chosen the three column design where the two sidebars are aligned to the right. You can view the progress of the Blogger Template Design Series blog using this link.
Coming soon
In the next installment of this series, I will explain how you can further modify this basic canvas to suit your requirements. This will include modifications to the margins, padding and the header section, plus a few other elements of the blog's style.Please consider subscribing to the feed for updates to the Blogger Template Design series, plus Blogger related news and articles as they are posted.


.png)


